This tutorial will teach you how to make a bridge that the player can go both over and under. It is entirely event based, and uses no scripts.
Requirements[]
None
Details[]
Make Your Map[]
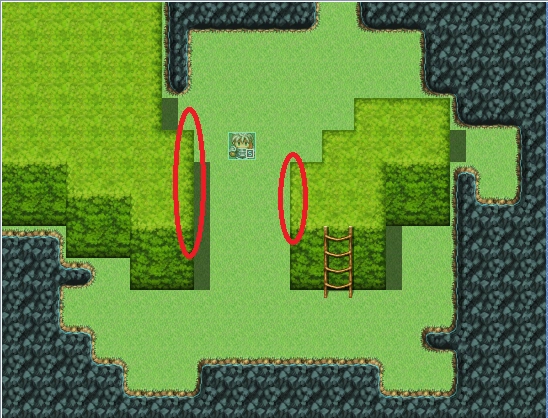
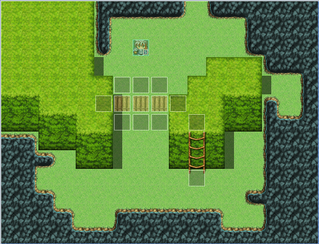
First, you must make the map. You can use any tileset you want. There are a few requirements for your map:
- There must be two different heights of ground which the player can walk on.
- The taller height must have two platforms, divided by a gap. It is over this gap that we'll add our bridge.
- There must be some way for the player to get from one height to another. A ladder or stairs, for example.
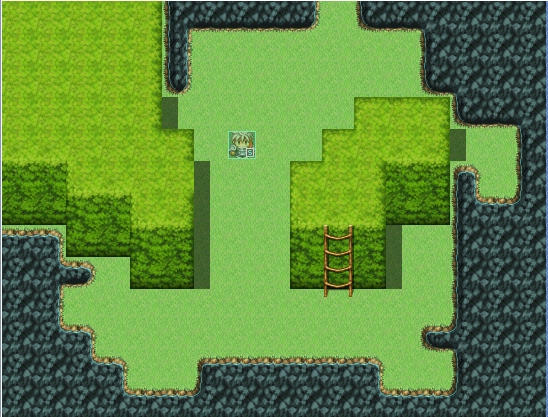
To build a second height off the ground, you will typically use an auto-tiled roof tile. These tiles will automatically create borders around the high-ground to keep the player on the correct height without just walking between them. When RPG Maker VX Ace generates a roof tile, it autotiles the roof accordingly. What this means is, if your roof tile has a ground tile to its north, then the roof’s northern edge will be a border.
This is generally desirable, but not next to the bridge. You want to eliminate the border on your high-ground that would separate the ground from the bridge. Do this by shift-clicking an appropriate roof tile in its place. Shift rightclick the tile you want to copy:

Then shift leftclick the tile you want to change
Do this for both sides of where you will add the bridge.
Create the Bridge Event[]
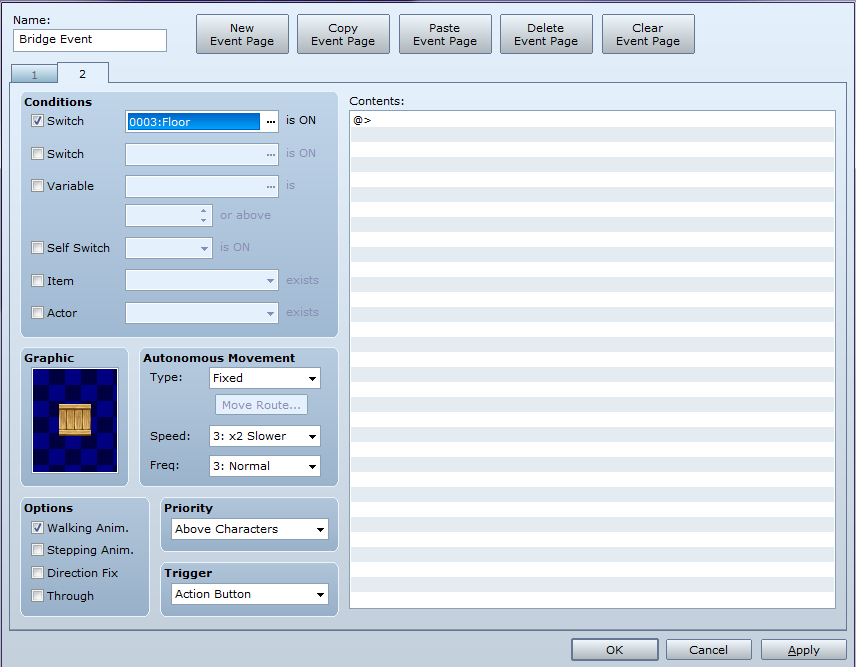
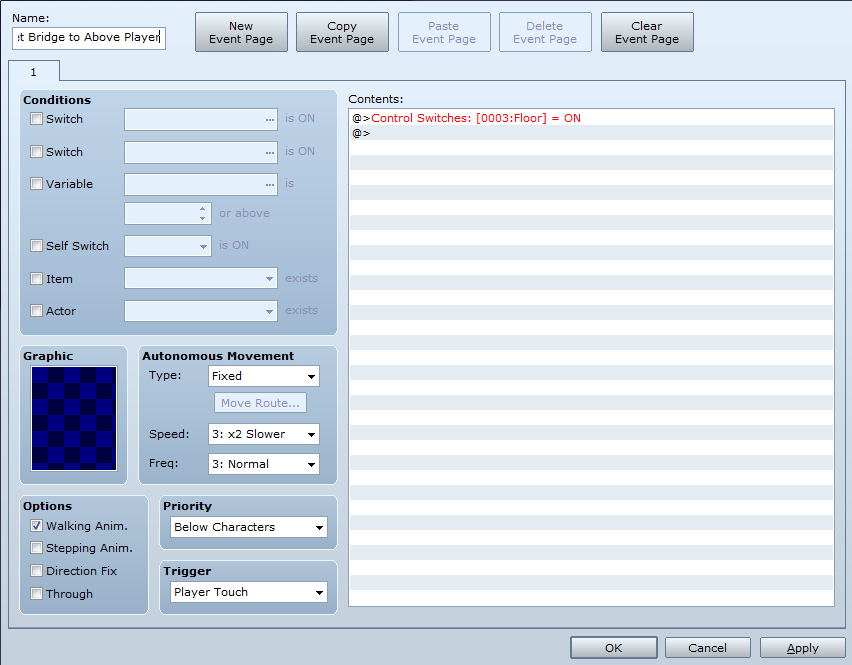
Make an event with two pages, each of which has the bridge graphic. On the first page, under "Priority" select "Below Characters." On the second page, under "Priority" select "Above Characters." Also on the second page, check "Switch" under conditions. Add a switch that must be ON for the second page to be displayed. I've called mine "Floor."
Copy/paste this event, and position your bridge events where you want your bridge to be, connecting the gap between the two high-level platforms.
Control the Switch With Two Events[]
Next, create a graphic-less event. Set the Priority to "Below Characters" and "Trigger" to "Player Touch." When the player touches the graphic, set the switch you created above to "ON."
Copy and paste this along the edges of your bridge on the lower level only. You can also place this at the foot of your ladder.
Create another event that is identical, but sets the switch to "OFF." Copy and paste this at the higher level entrance to your bridge, i.e., where the player will walk onto the bridge or off of the bridge. You can also place this at the top of your ladder.
